Quickstart - Introduction to Custom Integrations
Build your first custom integration in 10 minutes.
In this tutorial, you will learn how to create an app within Torii. You will send this app data about users, licenses, and usage using Torii's REST APIs. This tutorial should take approximately 10 minutes, even if you have no prior experience building custom integrations.
By the end of this guide, you will have a custom app called Hello World with data about users and their usage of licenses in the app.
You can follow the documentation for detailed instructions and screenshots or watch this tutorial video on building your custom integration.
Prerequisites
Before you begin, ensure you complete the following steps:
- Ensure you have a trial or active subscription to Torii.
Step 1: Create your API Key using the steps in Getting Started with the Torii API
- Follow the steps to create your API key.
Step 2: Create a custom app in Torii
This example uses a Custom Application called Hello World.
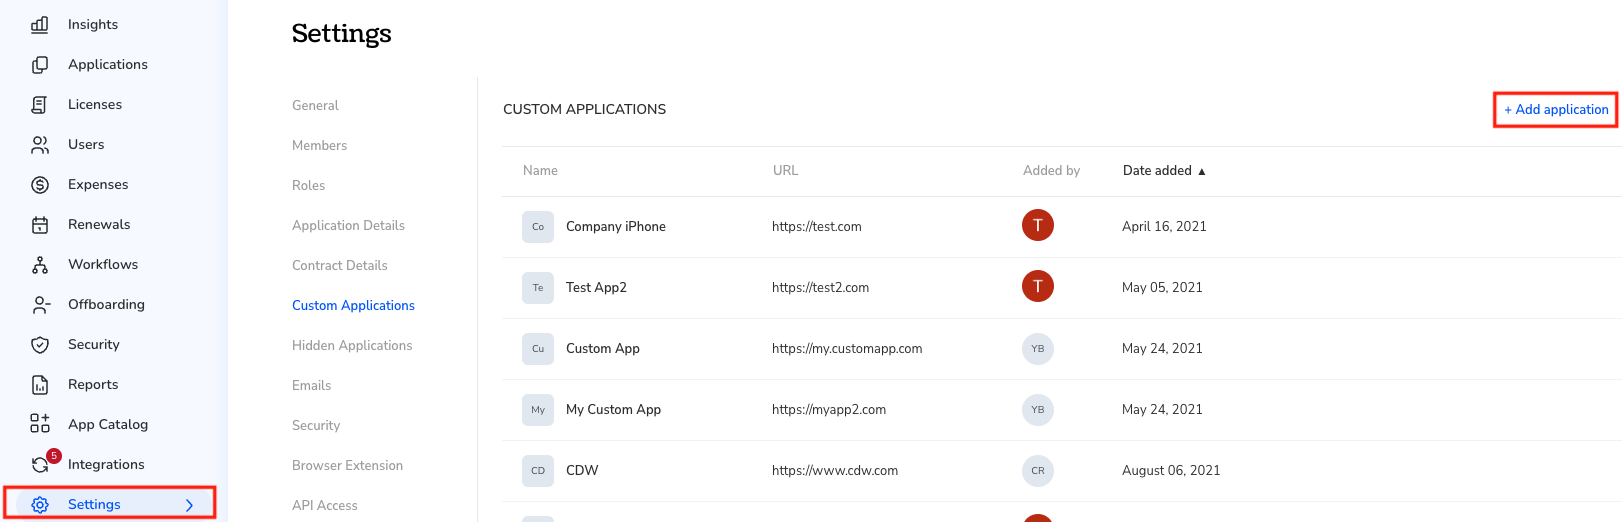
- In the Settings tab view, select Custom Applications, then select Add application from the right side of the page.
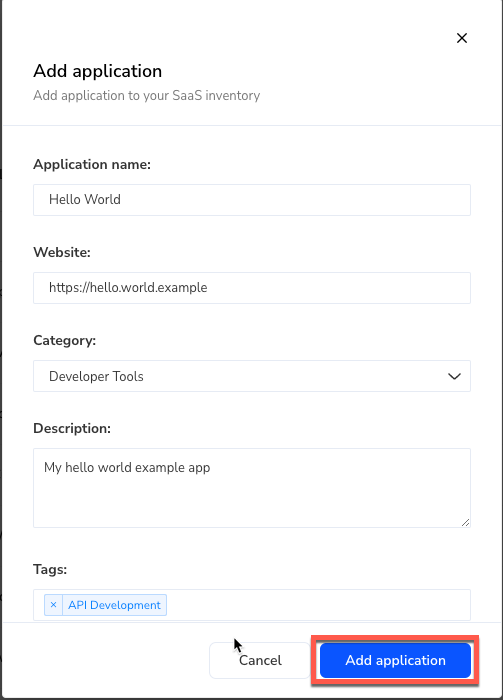
- Fill out details for the app and select Add Application.
Step 3: Add a custom integration for your app
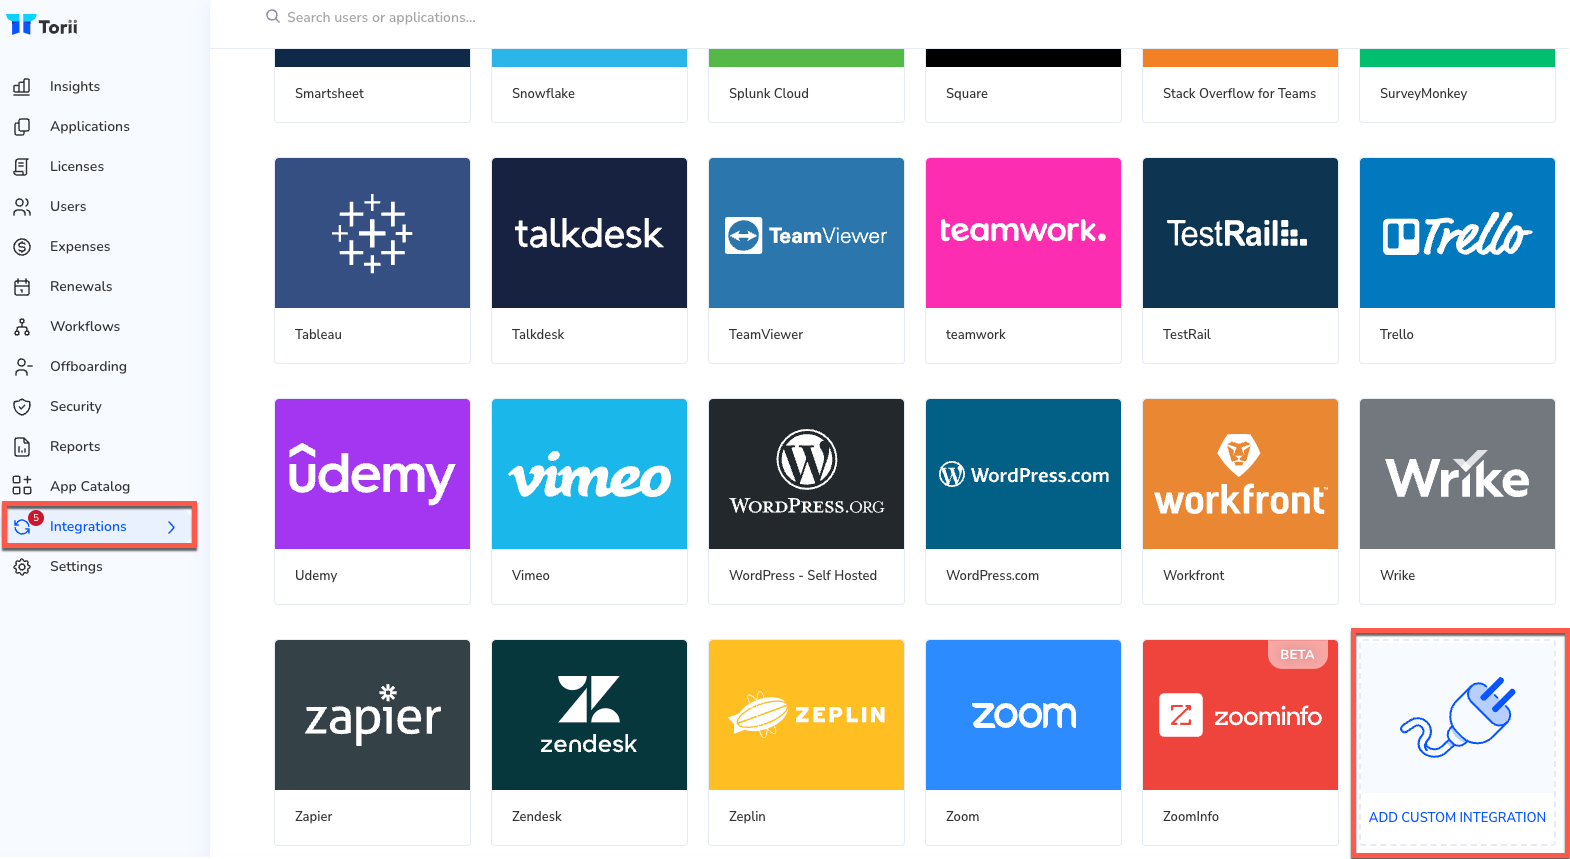
- Select the Integrations tab and scroll to the bottom of the page. Select the Add Custom Integration tile.
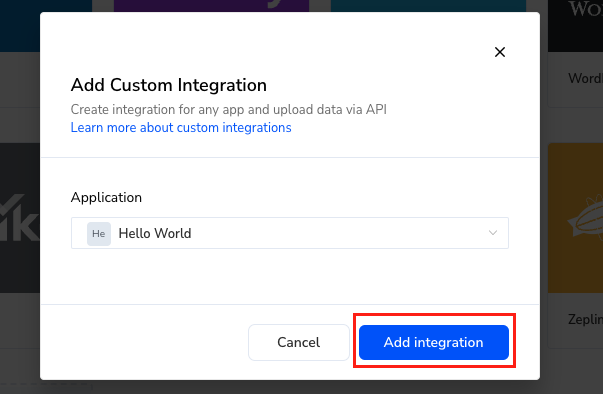
- A dialog box will pop up. Select the Hello World app you just added to Torii.
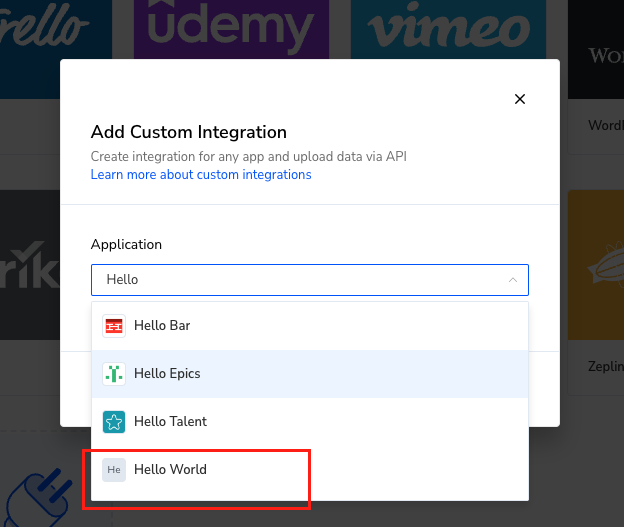
- Select Add Integration.
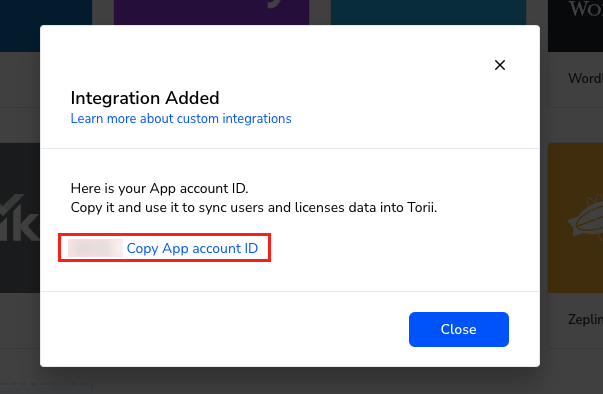
- Select Copy App account ID. This ID will be used in our API calls.
Tip
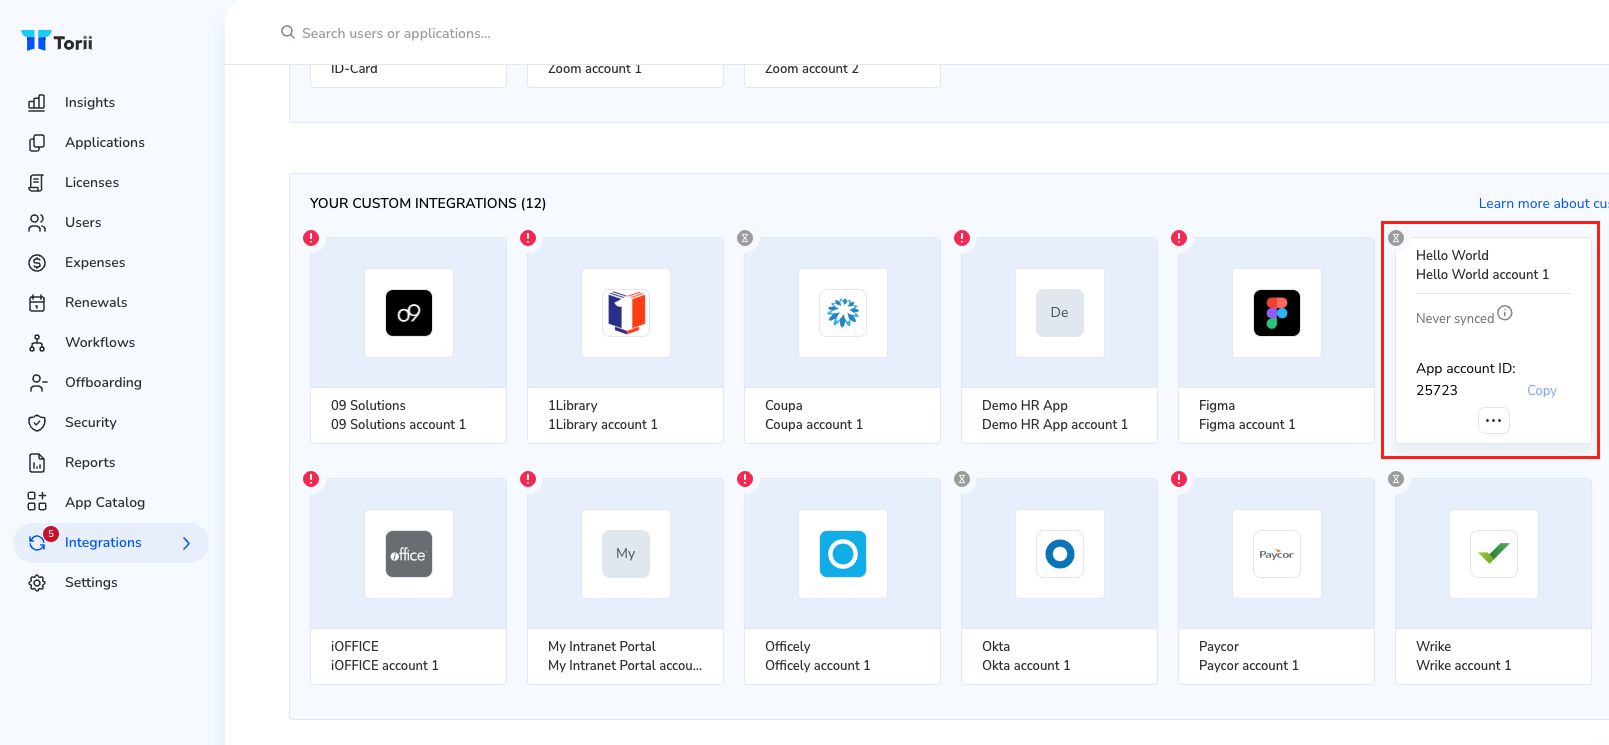
You can retrieve this App account ID at any time in the future. If you lose the App account ID, you can navigate to the integrations page and hover over the corresponding app tile.
Step 4: Use the Get URL call to create the file
- Within the API Explorer, navigate to Get URL. Within that page, under QUERY PARAMS, change the name query string parameter to hello_world.
- On the right side of the page, set the Authentication token value as your App Account ID that you copied in the previous section.
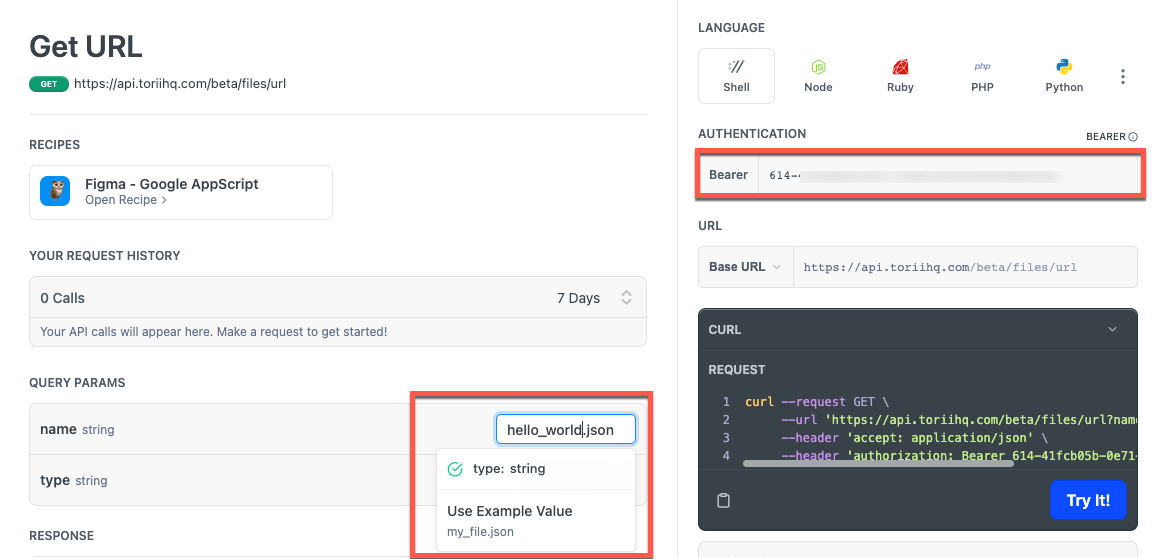
- Set the type query string parameter to customIntegrationData using the example value provided.
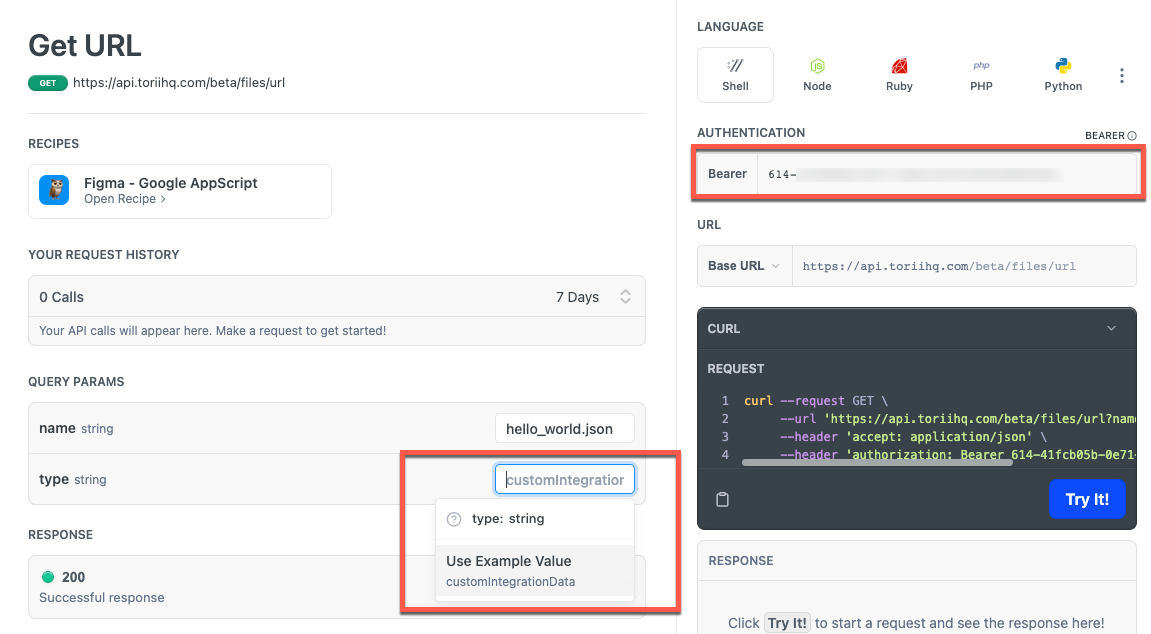
- Select the Try It button within the cURL section on the right side of your page.

- This should result in a generated response that will include the url and the filePath to be used in the next steps. Copy the entire response to a text editor or similar tool where it will be accessible. You will need the data in this response in the upcoming steps. You will only have 5 minutes to submit the next request
Tip
You can use a tool like JSON Editor Online to temporarily store your responses so you can use the data in API Explorer.
Step 5: Upload JSON file that contains your users, licenses, and usage dataStep
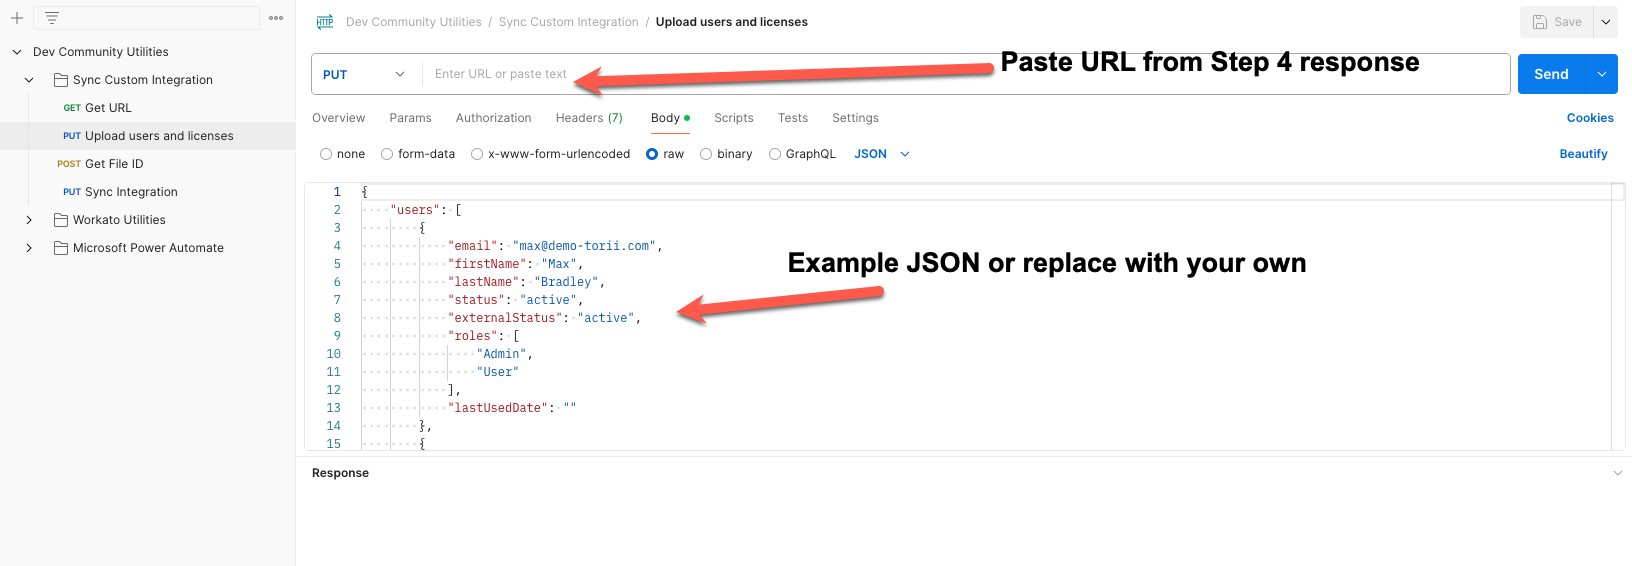
Below is a button that allows you to paste the value from url that you received in your Get URL response directly into a Postman request. This guide provides additional information on using Postman to validate your JSON payload. Select the 'Upload Users and Licenses' request and either use the example JSON or format the data you require. See Screenshot below.

Step 6: Use the GET File ID request
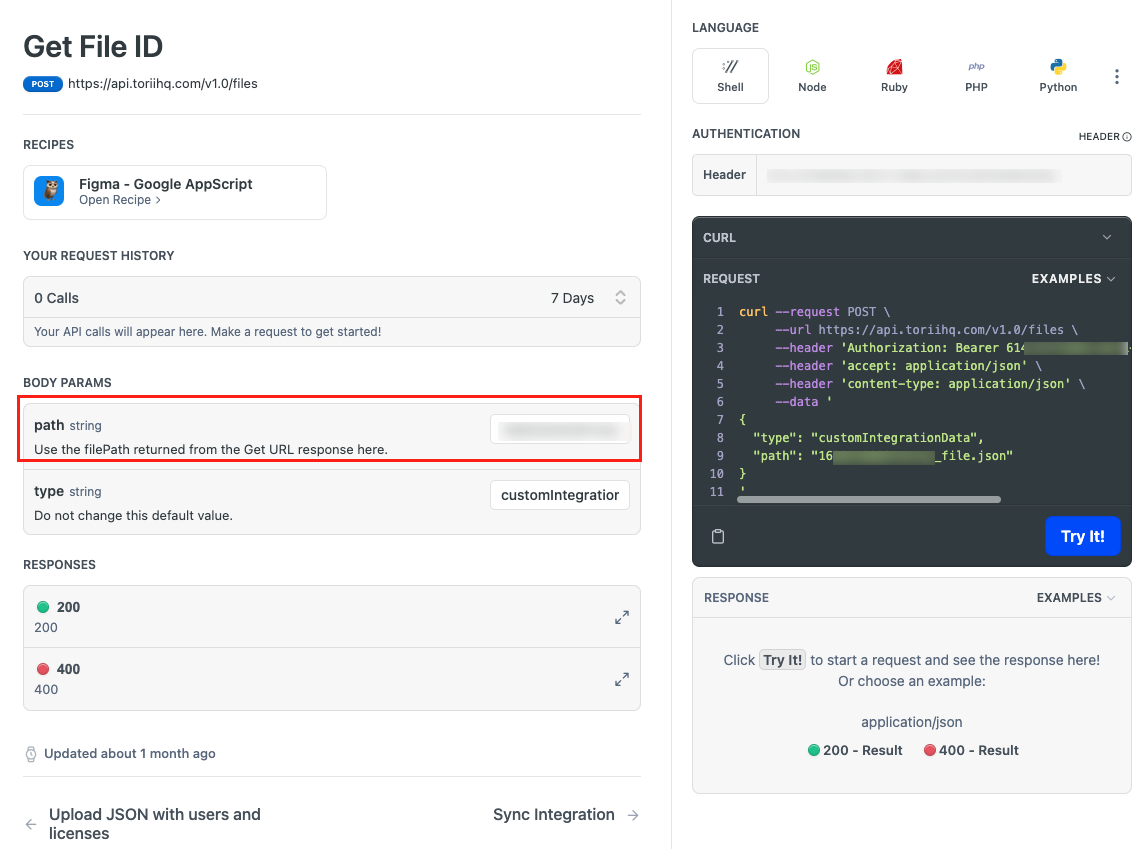
- Navigate to GET File ID and find the BODY PARAMS section. In the path string, paste the filePath value that we generated in the GET URL response in Step 4. The value for type should always be customIntegrationData - do not change the default in the API Explorer, and ensure this is set in your code when building. Select Try It!
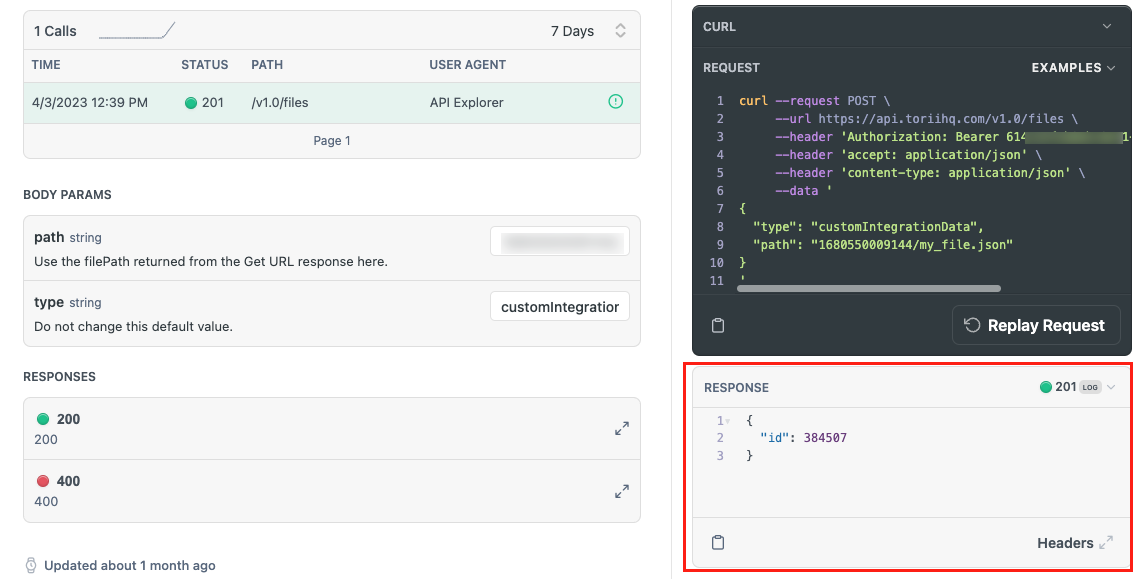
- In the response, look for an HTTP 201 success code, with the id of the file in the body. Copy this id value for use in the next step.
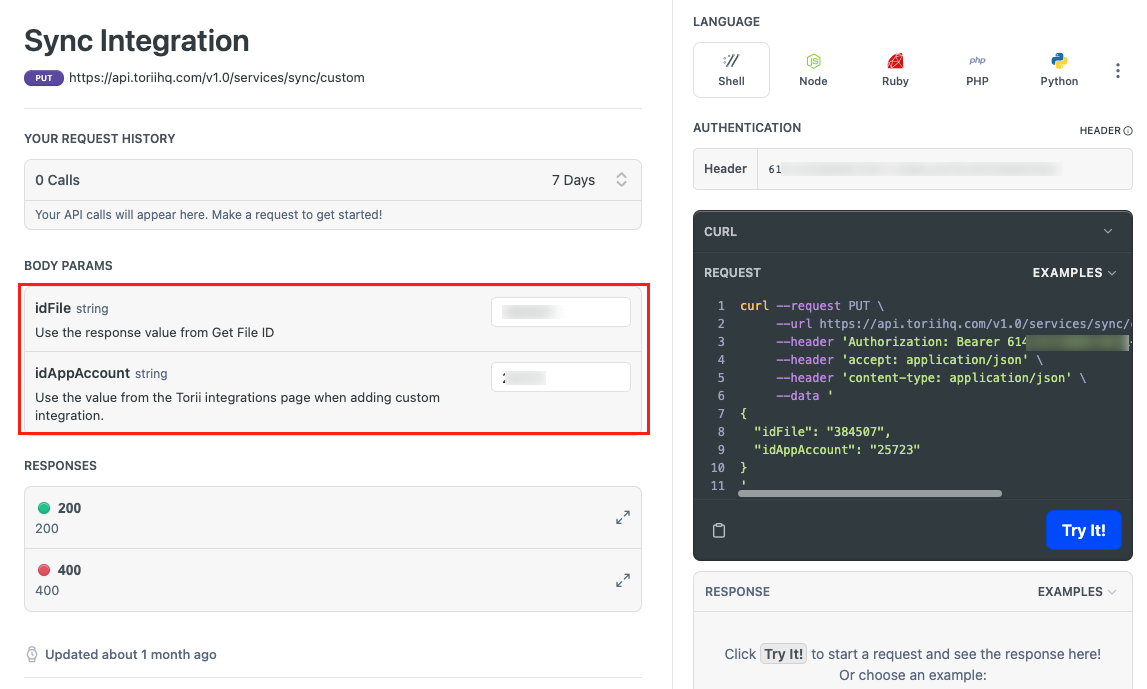
Step 7: Use Sync Integration to push the contents of the file to the Torii DB so it can be viewed through the console
- Navigate to the Sync Integration page. Under BODY PARAMS, paste your id value from the Step 6 into the idFile string field. Paste App account ID from Step 3. Select Try It.
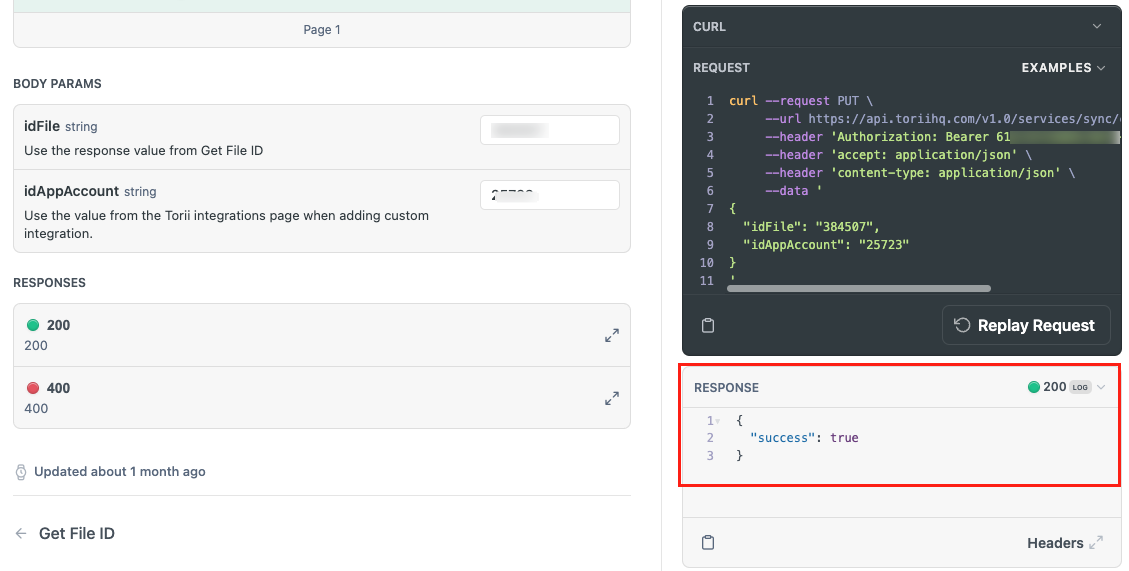
- Look for an HTTP 200 response code with success set to true as in the screenshot below.
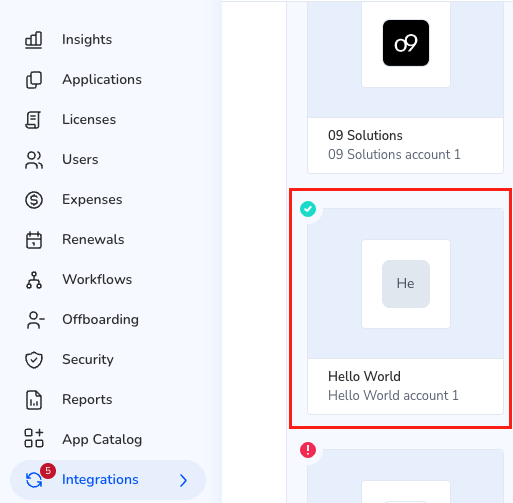
- Within Torii, navigate to the Integrations tab. Find the tile for your custom integration, Hello World. Confirm that you see a green check for your custom integration. This indicates a successful connection.
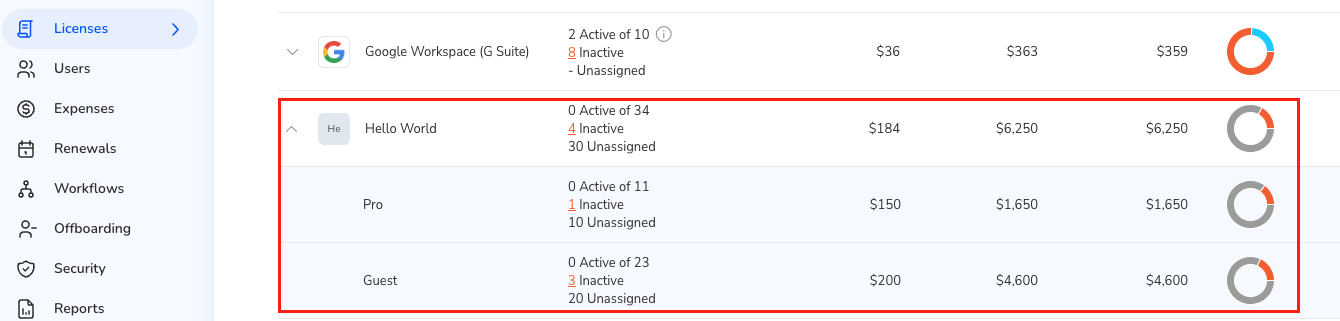
- To confirm that your example usage data was pushed, navigate to the Licenses tab and find Hello World from the list of applications. You should see active and inactive licenses listed on the Licenses page.
Congratulations!
You successfully created and integrated an app with Torii! You also sent data about users, licenses, and usage. That's one less shadow IT app in your ecosystem (even if you built it in the first place).
Updated about 1 year ago